tutorial_11_groot2
Groot2 is the official IDE to Edit, Monitor and interact with a Behavior Tree created with BT.CPP.
Integrating the two is very easy, as you will see in this tutorial, but there are some simple concepts that you should understand first.
The TreeNodesModel
Groot requires a "TreeNode model".
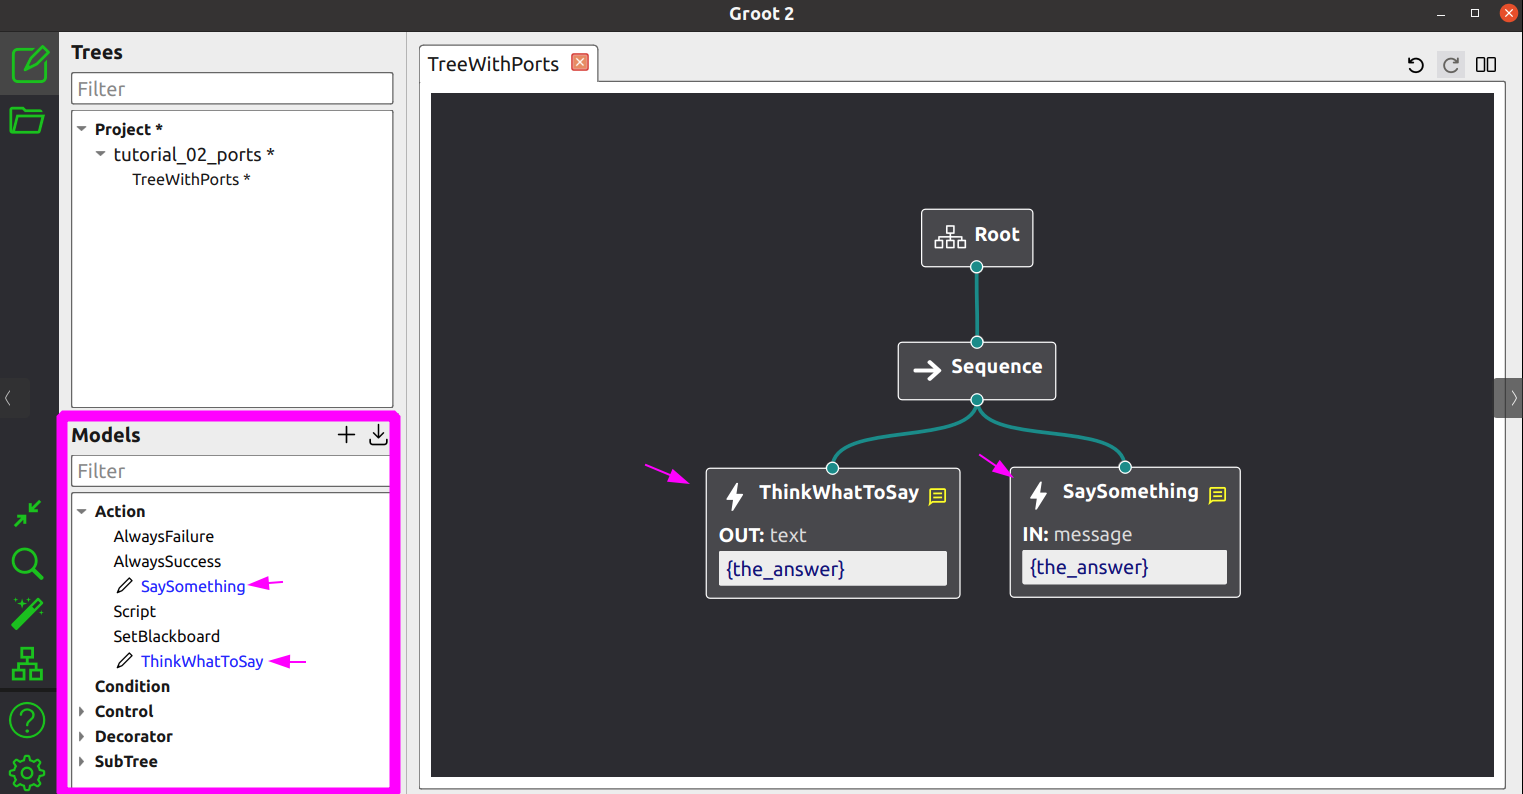
For instance, in the image above, Groot needs to know that the user-defined nodes
ThinkWhatToSay and SaySomething exist.
Additionally, it requires:
- The Node type
- Name and type (input/output) of ports.
These models are expressed in XML. In this case, they would be:
  <TreeNodesModel>
    <Action ID="SaySomething">
      <input_port name="message"/>
    </Action>
    <Action ID="ThinkWhatToSay">
      <output_port name="text"/>
    </Action>
  </TreeNodesModel>
Nevertheless, you should not create these XML descriptions by hand.
BT.CPP has a specific function that will generate this XML for you.
  BT::BehaviorTreeFactory factory;
  //
  // register here your user-defined Nodes
  //
  std::string xml_models = BT::writeTreeNodesModelXML(factory);

  // this xml_models should be saved to file and
  // loaded in Groot2
To import these models into the UI, either:
- Save the XML into a file (called for instance
models.xml) and click on the button Import Models in Groot2. - or manually add the XML section directly to your
.xmlor.btprojfile.
Adding real-time visualization to Groot
Currently, only the PRO version of Groot2 supports real-time visualization.
Connecting a tree to Groot2 requires a single line of code:
BT::Groot2Publisher publisher(tree);
This will create an inter-process communication service between your BT.CPP executor and Groot2 that:
- Sends the entire tree structure to Groot2, including the Models mentioned above.
- Periodically updates the status of the individual Nodes (RUNNING, SUCCESS, FAILURE, IDLE).
- Sends the value of the blackboard(s); basic types such as integers, reals and strings are supported out of the box, others need to be added manually.
- Allows Groot2 to insert breakpoints, perform a Node substitution or fault injection.
Full example:
<root BTCPP_format="4">

  <BehaviorTree ID="MainTree">
    <Sequence>
      <Script code="door_open:=false" />
      <Fallback>
        <Inverter>
          <IsDoorClosed/>
        </Inverter>
        <SubTree ID="DoorClosed" _autoremap="true" door_open="{door_open}"/>
      </Fallback>
      <PassThroughDoor/>
    </Sequence>
  </BehaviorTree>

  <BehaviorTree ID="DoorClosed">
    <Fallback name="tryOpen" _onSuccess="door_open:=true">
      <OpenDoor/>
        <RetryUntilSuccessful num_attempts="5">
          <PickLock/>
        </RetryUntilSuccessful>
      <SmashDoor/>
    </Fallback>
  </BehaviorTree>

</root>
int main()
{
  BT::BehaviorTreeFactory factory;

  // Our set of simple Nodes, related to CrossDoor
  CrossDoor cross_door;
  cross_door.registerNodes(factory);

  // Groot2 editor requires a model of your registered Nodes.
  // You don't need to write that by hand, it can be automatically
  // generated using the following command.
  std::string xml_models = BT::writeTreeNodesModelXML(factory);

  factory.registerBehaviorTreeFromText(xml_text);
  auto tree = factory.createTree("MainTree");

  // Connect the Groot2Publisher. This will allow Groot2 to
  // get the tree and poll status updates.
  BT::Groot2Publisher publisher(tree);

  // we want to run this indefinitely
  while(1)
  {
    std::cout << "Start" << std::endl;
    cross_door.reset();
    tree.tickWhileRunning();
    std::this_thread::sleep_for(std::chrono::milliseconds(3000));
  }
  return 0;
}
Visualize custom types in the Blackboard
The content inside the blackboard is sent to Groot2 using a JSON format.
To add a new type, and allow Groot2 to visualize them, you should follow the instructions here:
https://json.nlohmann.me/features/arbitrary_types/
For instance, given a user-defined type:
struct Pose2D {
    double x;
    double y;
    double theta;
}
You will need to include behaviortree_cpp/json_export.h and follow these instructions, based on your BT.CPP version.
Version 4.3.5 or earlier
Implement the function nlohmann::to_json():
namespace nlohmann {
  void to_json(nlohmann::json& dest, const Pose2D& pose) {
    dest["x"] = pose.x;
    dest["y"] = pose.y;
    dest["theta"] = pose.theta;
  }
}
Then, register the function adding this to your main:
BT::JsonExporter::get().addConverter<Pose2D>();
Version 4.3.6 or later
The implementation of the "to_json" function can have any name or namespace,
but it must conform to the function signature void(nlohmann::json&, const T&).
For instance:
void PoseToJson(nlohmann::json& dest, const Pose2D& pose) {
  dest["x"] = pose.x;
  dest["y"] = pose.y;
  dest["theta"] = pose.theta;
}
Register the function adding this to your main:
BT::RegisterJsonDefinition<Pose2D>(PoseToJson);